In Part 1 of this Basic Soapmaking for Beginners series, I explained how to make soap from scratch using just oils and lye.
In this part, I would like to show you how to add fragrance and colours to your soap.
Adding fragrances, colour and other additives is the fun part of making soap. Here is where your creativity is unleashed and you can come up with a variety of swirl designs, add embeds, play around with fragrances and essential oil blends to create your own…there is just so much that can be done.
There are two main additives used to scent your soaps:
- Essential oils
- Fragrance oils
A soap calculator such as SoapCalc.net can guide you as to how much essential or fragrance oil to use for your recipe. For my recipe, I worked with the default 0.5oz of fragrance per pound of soap.
Fragrances are usually added when a light trace is achieved. Some fragrances may be added when mixing the oils and some are added at the last minute as they can speed up trace and cause the soap to seize on you.
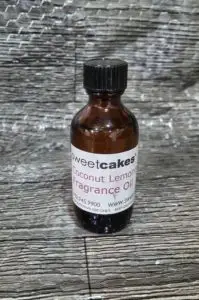
The fragrance that I chose for this soap is the Coconut Lemongrass fragrance oil from Sweetcakes. I find this oil to be a sweet yet earthy fragrance without being overpowering. It has a tropical-type aroma.
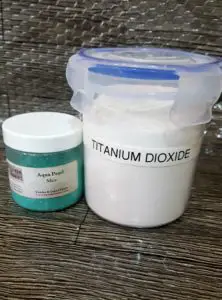
As for colourants, I used Titanium Dioxide and Aqua Pearl Mica, from Brambleberry.
Titanium dioxide is the pigment used to whiten soap and lighten other colours in soapmaking. It is commonly found in cosmetics, and food colouring and is used in sunscreen for its ability to absorb UV light.
Micas are powder pigments that are usually shimmery. Though the shimmer tends to get lost in cold process soap, it is still a good colourant to add hue and do designs.
There are so many free resources online as well as books to help you create different types of swirls and other colouring methods that you can be making awesome soaps in no time, and beyond the simple method I am showing you here.
Here is Part 1 in the series – How to Make Soap From Scratch, Soapmaking For Beginners.
Please read through Part 1 as it explains the basics of soapmaking as well as equipment that can be used to get started making soap at home. Be sure to read the safety information as it is very important when working with lye.
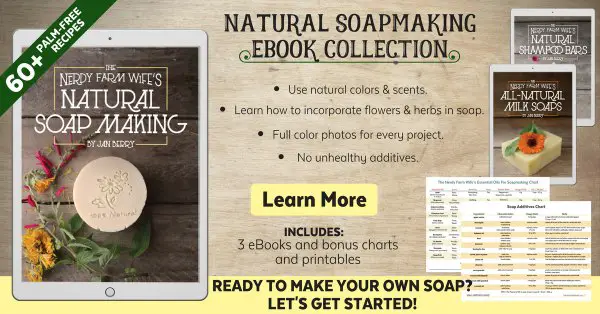
If you would like a complete collection to learn how to make all-natural soaps, I recommend checking out The Nerdy Farmwife, Jan Berry’s Natural Soapmaking Collection.
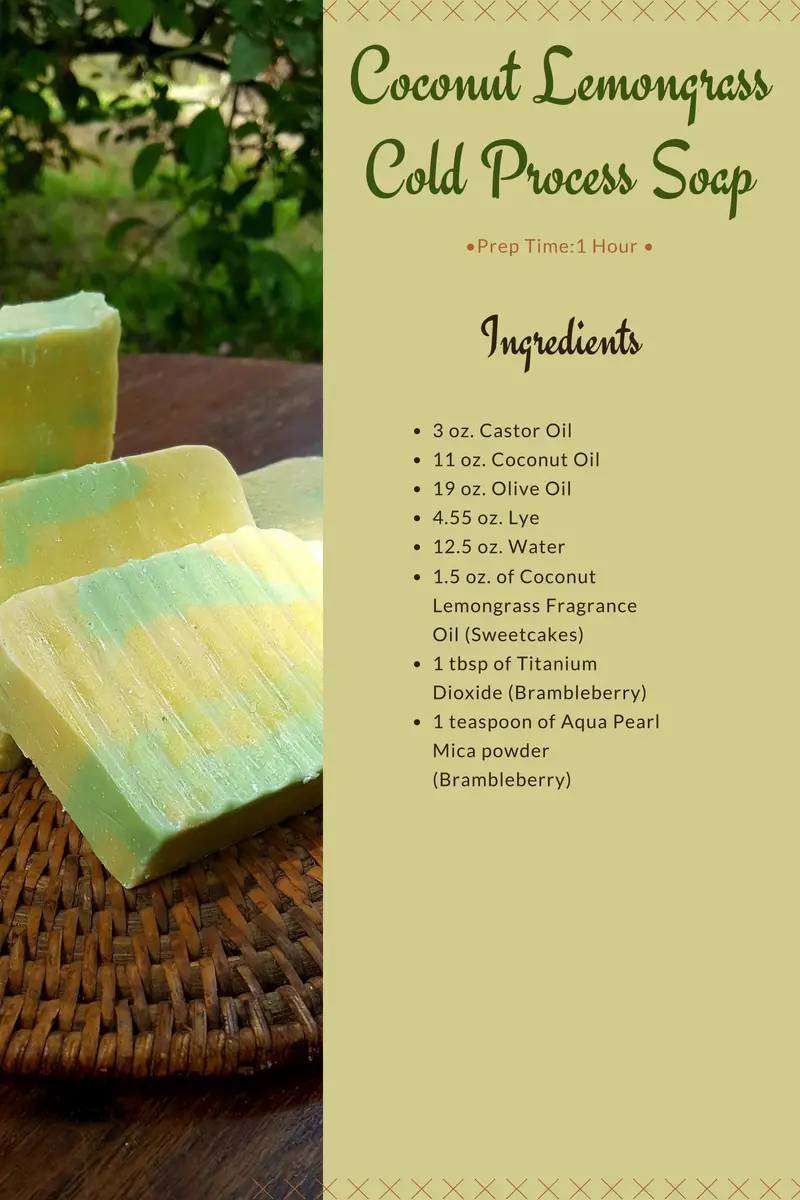
I used the same recipe from the previous Soapmaking for Beginners post as follows:
- 3 oz. Castor Oil
- 11 oz. Coconut Oil
- 19 oz. Olive Oil
- 4.55 oz. Sodium Hydroxide
- 12.5 oz. Distilled Water
Then I added:
- 1.5 oz. of Coconut Lemongrass Fragrance Oil (Sweetcakes)
- 1 tbsp of Titanium Dioxide (Brambleberry)
- 1 teaspoon of Aqua Pearl Mica powder (Brambleberry)
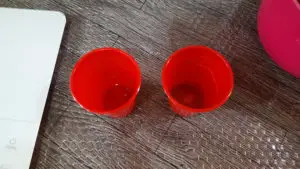
Note: Prepare the colourants in small plastic cups or containers before mixing your soap to have them ready to pour at trace.
Also, weigh out your fragrance oil and set it aside as well – be sure to use a glass container as undiluted fragrance oils tend to eat away at plastic.
Instructions
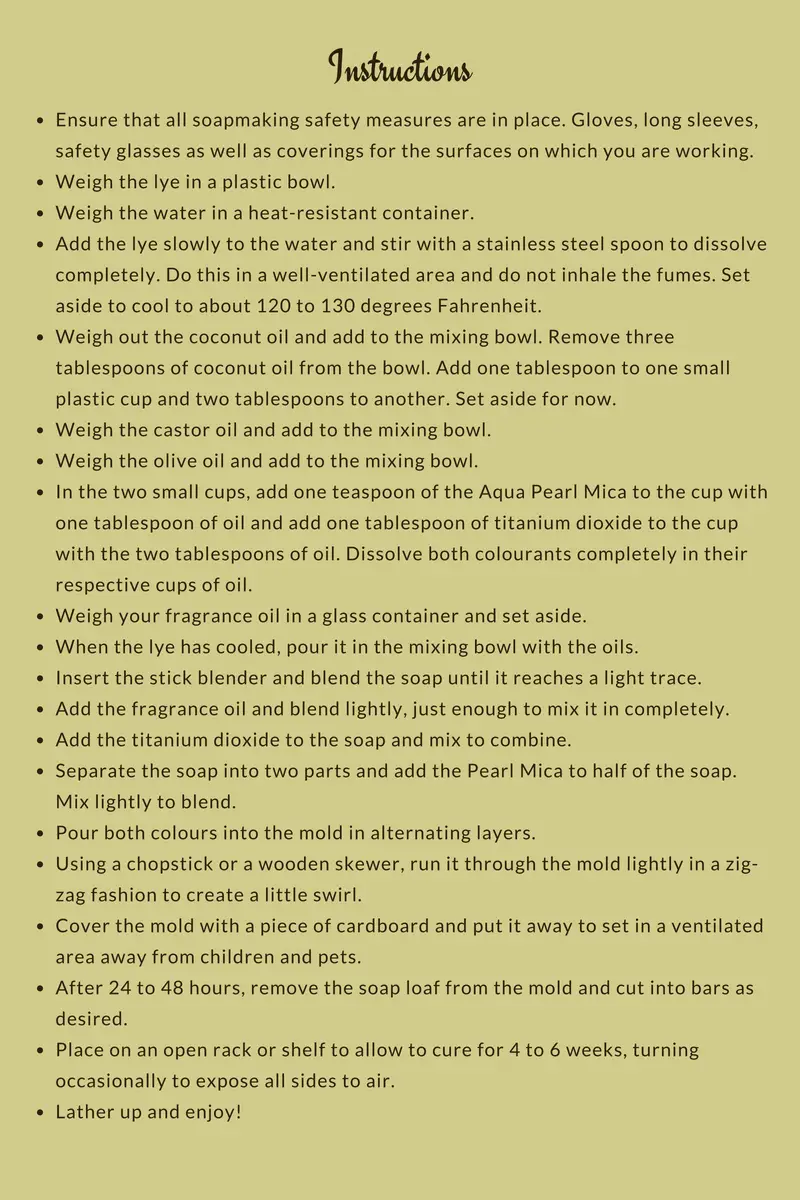
- Ensure that all soapmaking safety measures are in place. Gloves, long sleeves, safety glasses as well as coverings for the surfaces on which you are working.
- Weigh the lye in a plastic bowl
- Weigh the water in a heat-resistant container.
- Add the lye to the water and stir with a stainless steel spoon to dissolve completely. Do this in a well-ventilated area and do not inhale the fumes. Set aside to cool to about 120 to 130 degrees Fahrenheit.
- Weigh out the coconut oil and add it to the mixing bowl. Remove three tablespoons of coconut oil from the bowl. Add one tablespoon to one plastic cup and two tablespoons to the other. Set aside for now.
- Weigh the castor oil and add to the mixing bowl.
- Weigh the olive oil and add to the mixing bowl.
- In the two small cups, add one teaspoon of the Aqua Pearl Mica to the cup with one tablespoon of oil and add one tablespoon of titanium dioxide to the cup with the two tablespoons of oil. Dissolve both colourants completely in their respective cups of oil.
- Weigh your fragrance oil in a glass container and set it aside.
- When the lye has cooled, pour it into the mixing bowl with the oils.
- Insert the stick blender and blend the soap until it reaches a light trace.
- Add the fragrance oil and blend lightly, just enough to mix it in completely.
- Add the titanium dioxide to the soap and mix to combine.
- Separate the soap into two parts and add the Aqua Pearl Mica to half of the soap. Mix lightly to blend.
- Pour both colours into the mould, alternating layers.
- Using a chopstick or a wooden skewer, run it through the mould lightly in a zig-zag fashion to create a little swirl.
- Cover the mould with a piece of cardboard and put it away to set in a ventilated area away from children and pets.
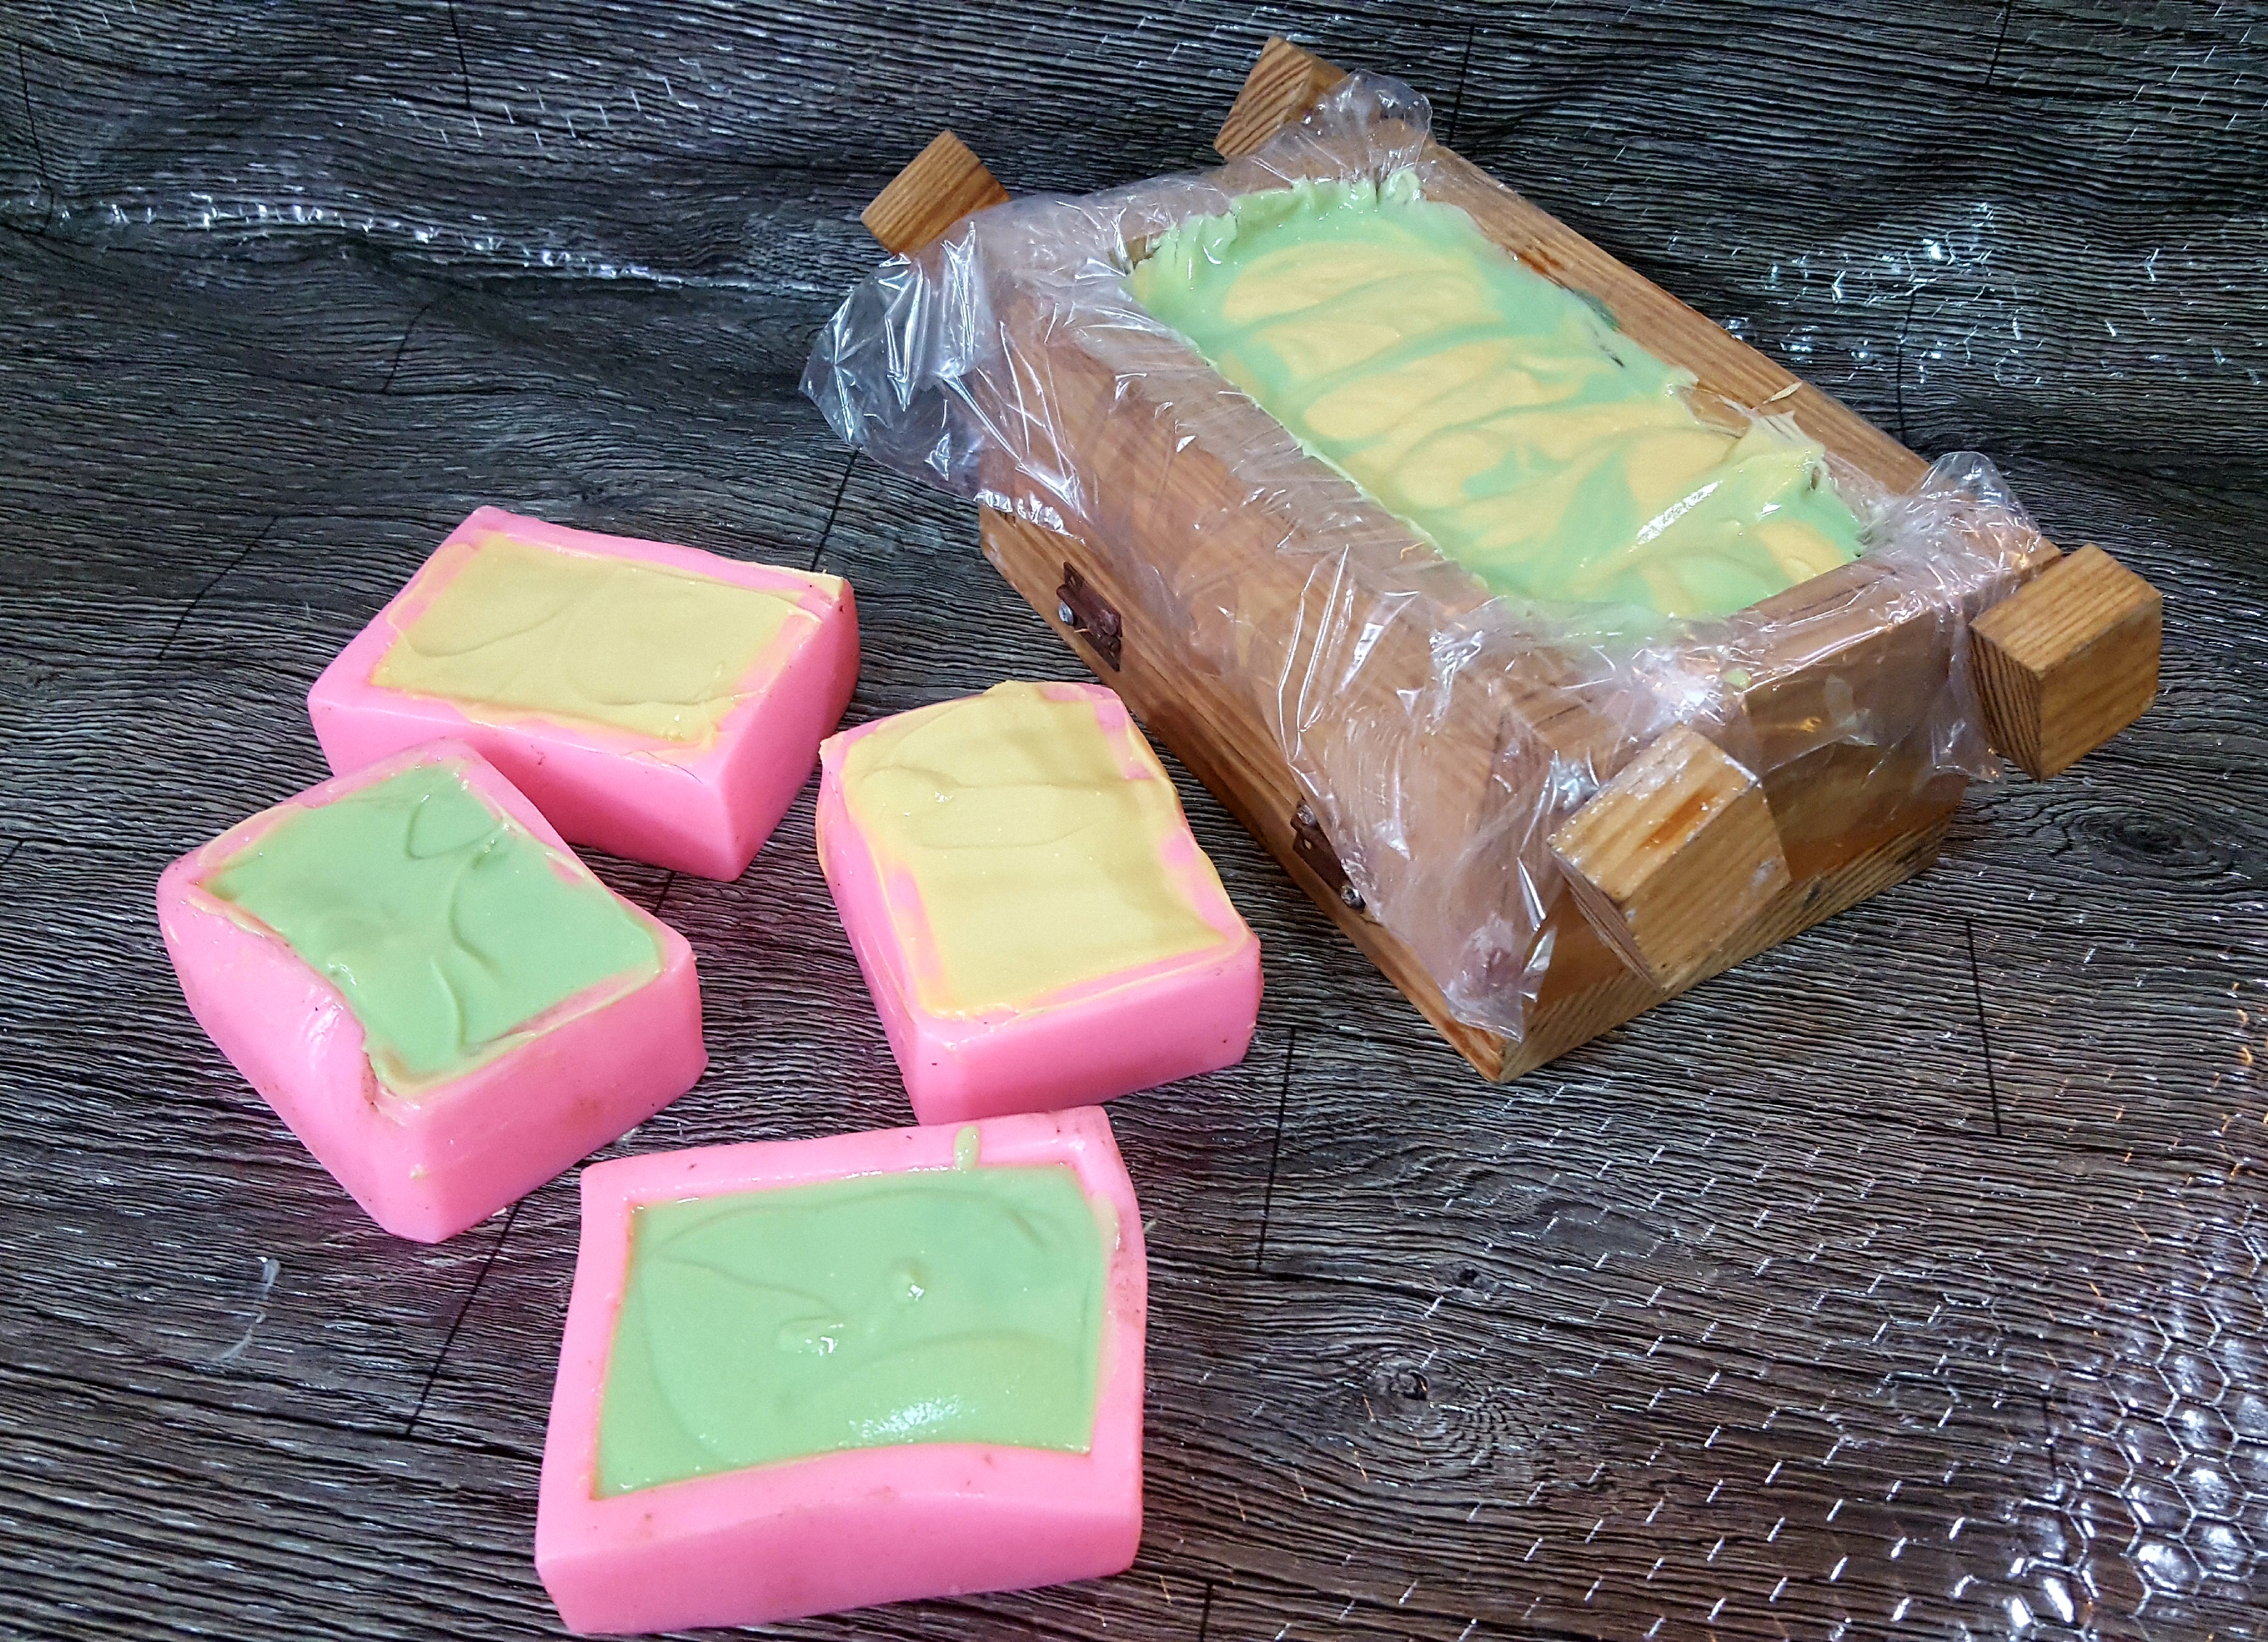
- After 24 to 48 hours, remove the soap loaf from the mould and cut it into bars as desired.
- Place on an open rack or shelf to allow to cure for 4 to 6 weeks, turning occasionally to expose all sides to air.
- Lather up and enjoy!
Note: Titanium dioxide tends to need a lot of mixing to be properly dissolved and to prevent little clumps. This handheld whisk is a must-have tool in your soapmaking toolbox to dissolve colourants.
Unfortunately, my handheld whisk got misplaced in a recent move and I need to get a new one, but that was not going to stop me from making this recipe for you. Instead, I mixed it as best as I could with a spoon.
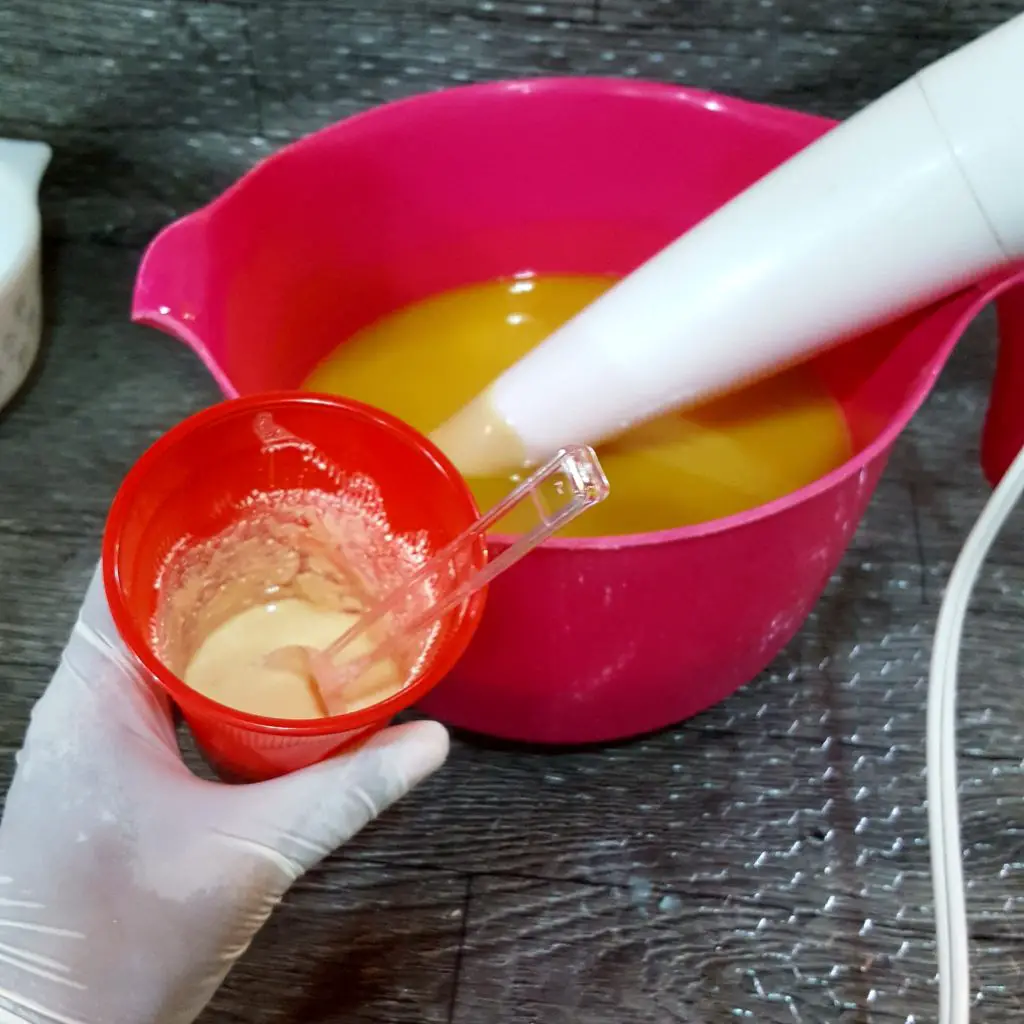
I wanted all of the soap to be lightened with the titanium dioxide so I poured it into the entire mixture and gave it a few pulses with the stick blender, just enough to mix it in.
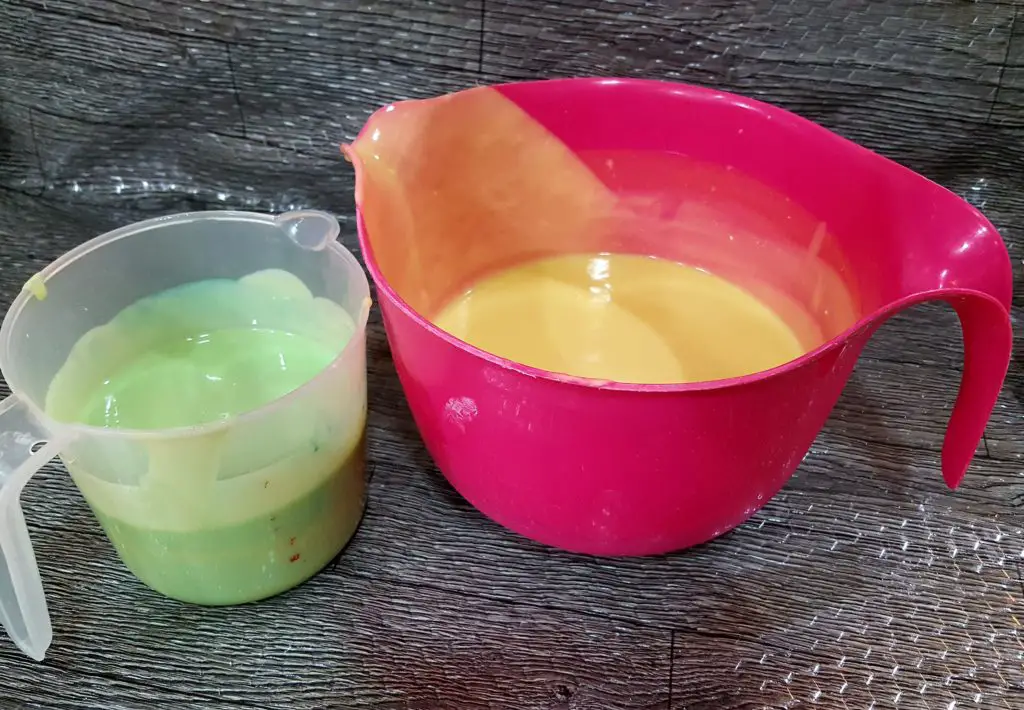
Next, I divided the mixture into two parts and added the mica to half of the soap, again mixing it in just enough to colour it. From here I needed to work quickly as the soap was starting to thicken up.
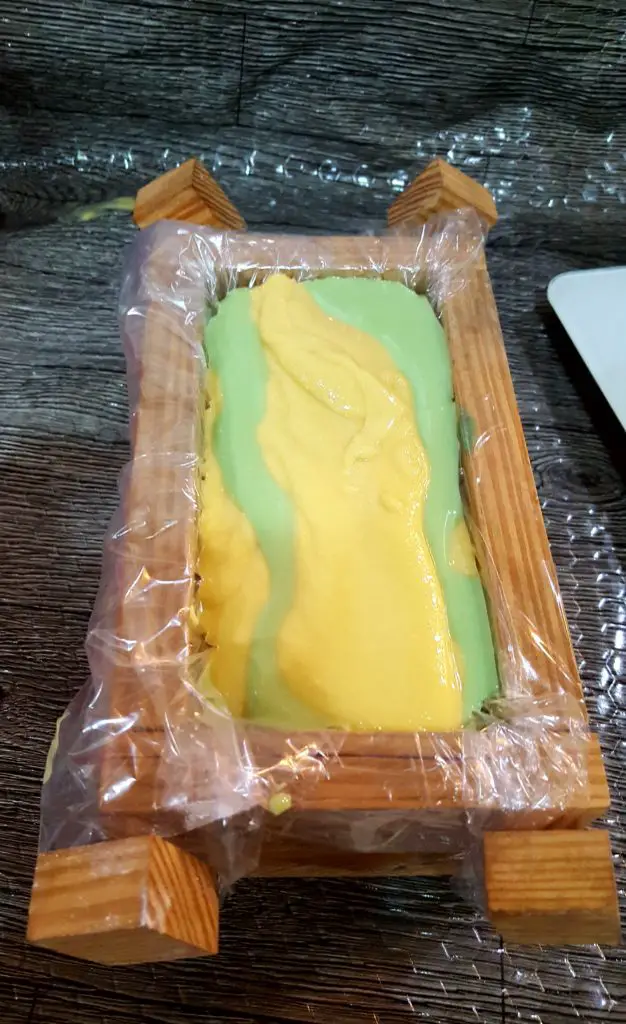
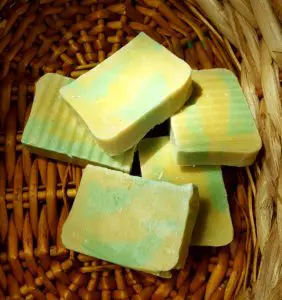
No fancy swirls here – I just poured alternate layers of the different colours into the wooden soap mould, then with a wooden skewer, I ran it across the soap in a zig-zag fashion just to do a little design. Again, keeping it simple.
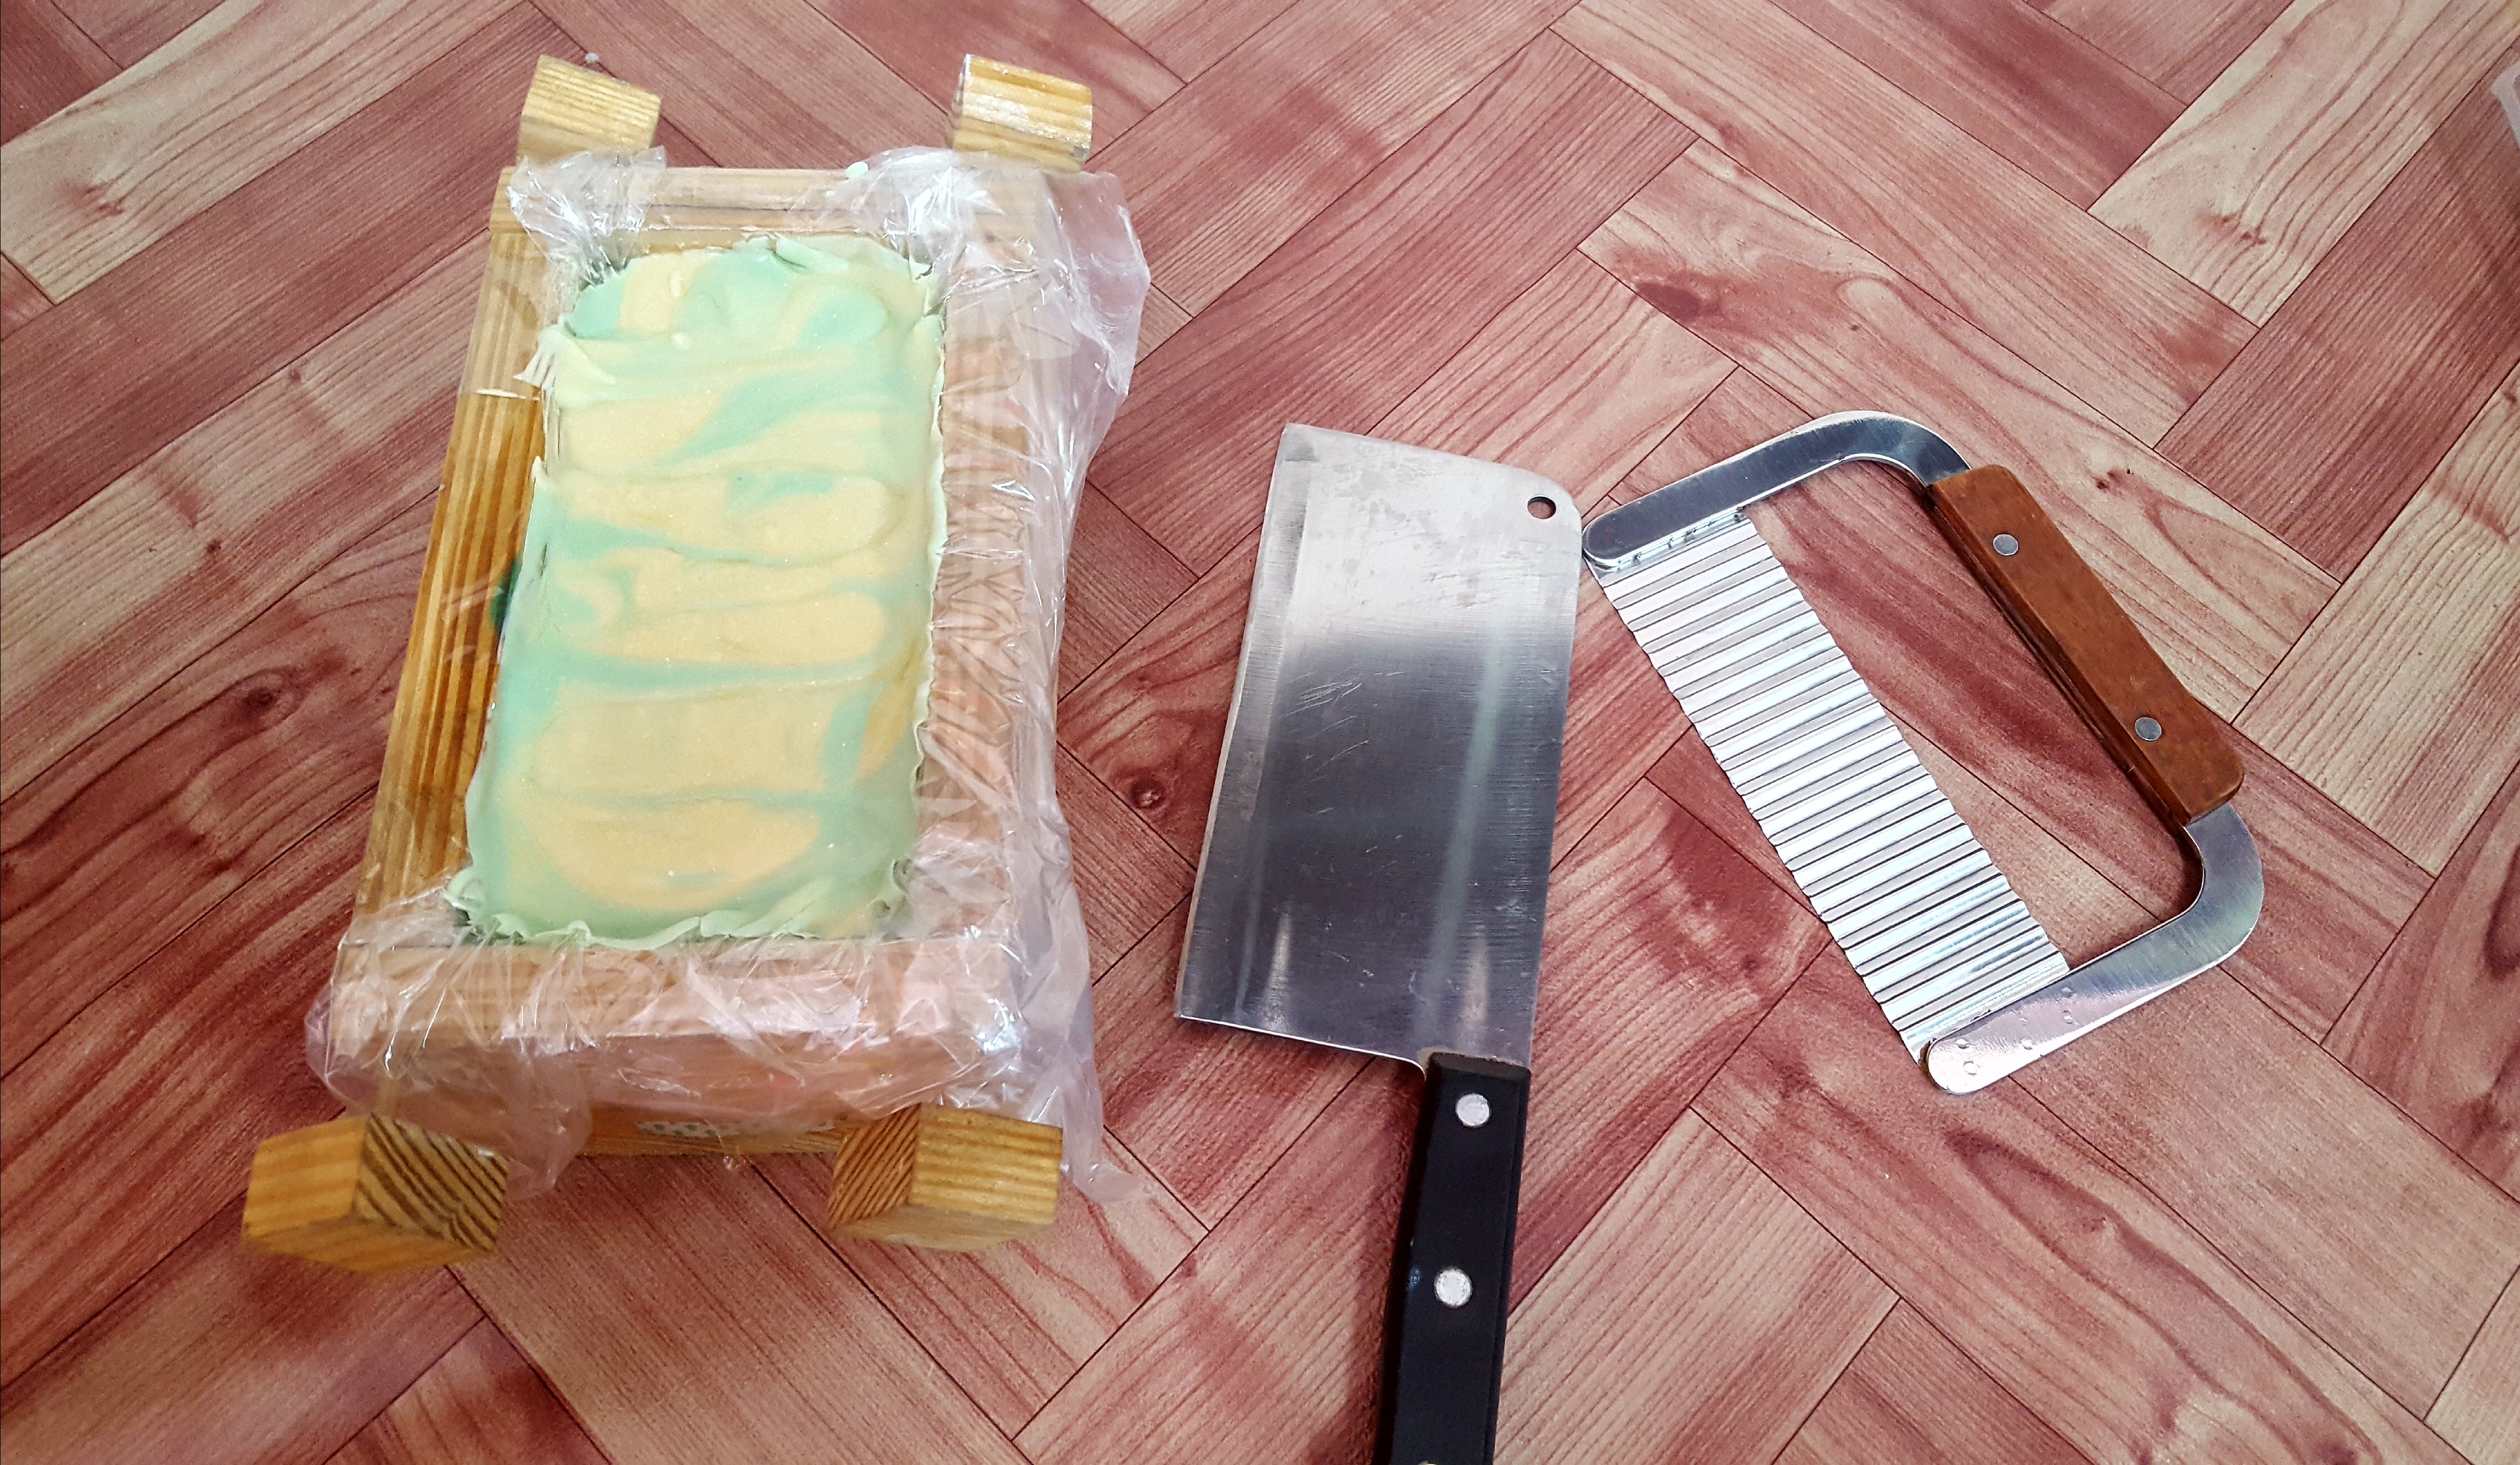
My wooden mould holds about 2.5 pounds of soap so the remainder of the soap, I poured into these Longzang silicone moulds, which I love because they are so detailed.
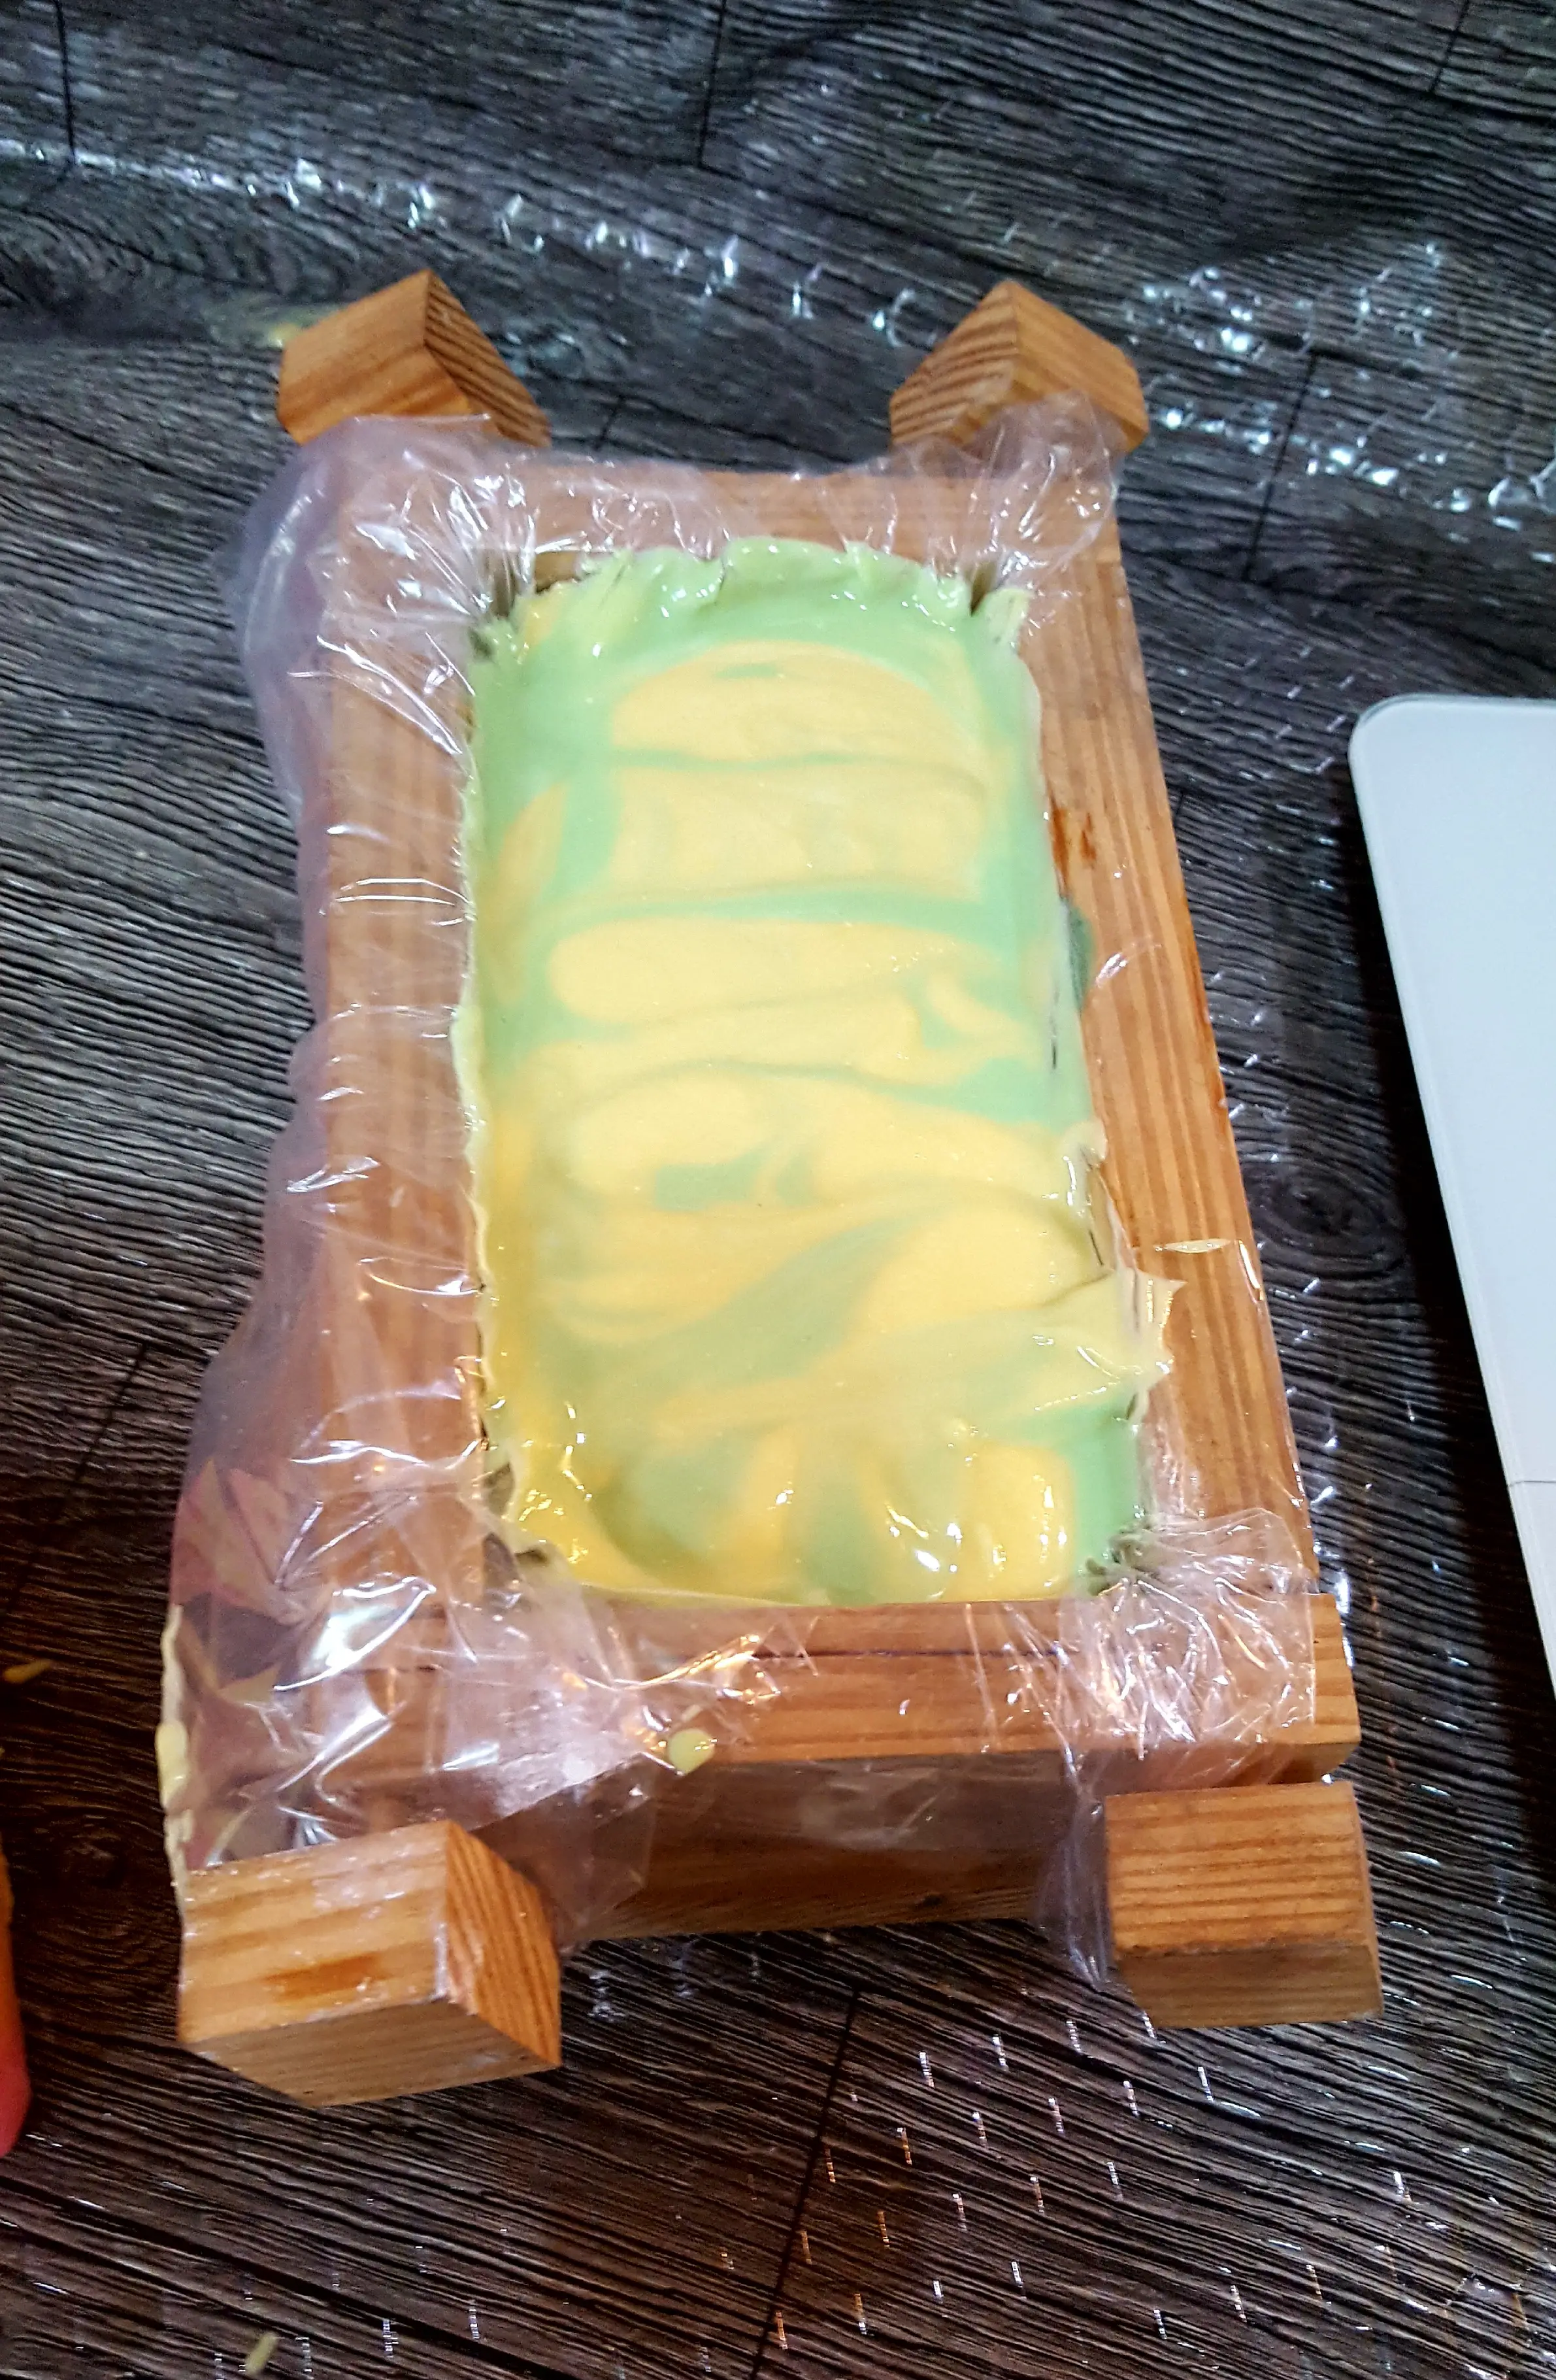
Next, I allowed the soap to sit in an area away from children and pets for about 36 hours to give it enough time to set in the mould, especially the silicone moulds.
Then it was time to cut the soap. I used both a wavy edged cutter and a straight edge chopper to cut the loaf.
Here are the soaps that were poured into the Longzang silicone moulds.
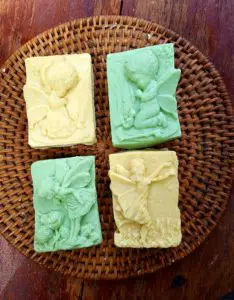
Children especially love the fairy and character soaps.
This is a very basic introduction to cold-process soapmaking. It is an exciting feeling when you make your first batch from scratch. So, if you have always wanted to try making soap, I encourage you to start today. Play around with different recipes, fragrances and colours and create awesome handmade soaps. There are lots of free recipes online.

Most of all, have fun in your soapmaking journey!