Do you like to spend time reading blogs from around the world and just know that you would enjoy being a blogger? Are you worried that you do not have the technical know-how to start a website? Have you seen bloggers’ income reports and wonder if you too can make money online with a blog?
Well, if you love to write and would like to share your voice with the world then you should definitely start a blog.
In this post, I will show you how to get started and have your own website up and running in no time.
Benefits of Having a Blog
There are many benefits to starting your own blog:
- You can be recognized as an expert in your field
- You can help others by sharing your knowledge or experience
- You can meet and network with others in the blogging community
- You can use it to promote and grow your business
- It is a way to document a journey
- You can use it as an online portfolio
- You will improve your writing skills the more you write
- You can make money online
- You develop self-discipline
- You learn a lot of cool techy stuff you otherwise might not know
A blog does take commitment and work for it to thrive, but it is very possible to make decent passive income from your blog.
One of my favourite bloggers is Suzi Whitford from Start A Mom Blog. Suzi is very successful at blogging and was able to retire her husband at 30 years of age! Now they both earn an income from home and are able to parent their children full-time.
Suzi was able to grow her blog from the ground and now makes over $40,000.00 per month.
There are many bloggers earning a solid income from their blogs, some have been able to leave the corporate world and now work from home for themselves.
How do Bloggers Make Money?
Maybe you have been wondering how exactly bloggers make money online. Well, your blog can be monetized through various avenues:
- Affiliate Marketing
- Ads
- Sponsored Posts
- Selling your own products such as courses, ebooks, printables, etc.
- Offering a service
Why do you want to blog?
I think this is one of the first questions that you have to ask yourself. What are your blogging goals?
If you just would like a creative outlet to share your views, thoughts, opinions etc., with an audience then you may not have to delve heavily into traffic or monetization strategies.
You may just want to start a blog as a hobby.
However, if you want to monetize your blog, then more brainstorming and planning will have to go into the process. You will have to treat your blog as a business.
So, I suggest you start with what you would ultimately like to achieve through blogging.
Once you have decided this, then it is time to pick a niche.
Decide on a Niche
A niche is a focused area or topic you that you will be writing about on your blog.
When choosing a niche you have to be sure that it is a subject that you are interested in and can comfortably create content for in the long term. If not, you will soon find that it will become a chore and it may become difficult to sustain.
When brainstorming a niche, start with your strengths, talents and interests. What are you passionate about? What do you have experience in? How can you bring value to the lives of others with your knowledge?
If you have knowledge in a particular area, like freelance writing, you can teach others how to make money from home by starting a freelance business. Elna Cain from elnacain.com and Twins Mommy is a well-known mommy blogger in this niche.
You could possibly blog about a journey that you are on – for example, weight loss or living a positive and sober life like Allie from The Pinkest Cloud.
Here are a few other niche ideas:
- Food and Cooking
- Travel
- Spirituality
- Survival
- Photography
- Gardening
- Personal Development
- Parenting
- Books and Book Reviews
- Fitness
- DIY
- Healthy living
- Crafting
- Budgeting
There are many tools and websites to help you do research about the popularity of your chosen niche.
Pinterest, Google Trends, Buzz Sumo, are just a few sites to get you started.
Once you have chosen your niche, next define your potential readers. Who are they? Create a persona for your ideal reader. This helps to identify a target audience for your writing.
Ask yourself questions like:
- What does he or she do for a living?
- What are their interests?
- What do they do for recreation?
- Where do they like to shop?
- What problem do they need help solving?
Visit other blogs in your chosen niche and read comments left by visitors to the blog. This gives you an idea of what information people appreciate or need on a given topic.
This research will help you to niche down, as well. Niching down means that you further find the niche within the niche to become more specific in your topic. This helps you to focus even more on providing quality content for your ideal reader.
For example, in the Soaping niche, you may decide to write only about making natural handmade soaps or in the food niche, you could write specifically about ketogenic recipes.
There are basically two types of blogging platforms: Hosted (free) and self-hosted.
Some free blogging sites are:
- WordPress.com
- Tumblr
- Weebly
- Blogger
Disadvantages of Free Blogging Platforms
It is definitely better to get your own domain name and hosting for your website rather than start a blog on a free site.
Listed below are some disadvantage of choosing a free blogging site:
- Your domain name will have part of the free platform in the address name, such as yourdomain.wordpress.com or yourdomain.blogspot.com and may not be taken as seriously as if you have your own domain.
- You cannot use third-party themes.
- Some monetization strategies are not allowed on these platforms. For example, Google Adsense or affiliate marketing may not be allowed.
- Built-in features are limited
- You get better ranking on search engines with a self-hosted blog.
- A free platform can shut down your blog at any time.
It is recommended, therefore, that you get a self-hosted platform. With self-hosting, you pay for hosting yourself and therefore you have control over your blog.
The two things you will need to get started are a Domain and a Web Hosting provider.
A Domain is an address name you choose for your website that visitors type in to find and access your site – for example, http://www.ireallylovetoblog.com.
A Web Host is a company that provides a space or location for your website to be viewed on the internet.
Choose a Domain Name
Now that you know your niche, it is time to pick a name for your blog.
When choosing a domain name keep in mind that it will become part of your brand, but also remember that if you really need to, you can change it along the way, so do not get stuck at this stage.
Some tips for choosing your domain name:
- It must be memorable.
- It should be unique.
- It should be easy to type.
- It should not be too long.
- Avoid special characters, like numbers and hyphens.
- It should relate to your chosen niche.
You should opt for a .com extension as it is the most popular and recognisable and holds the most authority.
Ideally, the name should be available across the social media platforms that you plan to use. If so, register them as your own to secure the name as soon as you can.
If you would like a little help finding a suitable domain name, and also checking the availability of the name, you can use a domain name generator like Lean Domain Search for some ideas.
Get a Web Host
When I wanted to start a blog, I had no idea about choosing a host. I did a lot of research into what host the top bloggers were using at the time and that’s when I discovered HostGator. I was pleased with the feedback and reviews of the bloggers and did not hesitate to sign up with them. I was not disappointed at all and to this day, I recommend them to anyone who would like to start a website.
If you would like more information on choosing a web hosting provider before you commit, here is an article that may help you to decide.
Benefits of Choosing HostGator as Your Web Host
HostGator, based in Houston, Texas, USA, is one of the largest award-winning web hosts in the world with over 9 million domains and over 400,000 customers from around the globe.
Here is why you should choose HostGator to host your website:
There is a 45-day money-back guarantee
You can try HostGator risk-free and if you decide they are not for you, simply cancel your hosting plan within 45 days for a full refund.
24/7/365 Customer Support
The customer support is excellent and I can attest to this! I have always had prompt helpful service, from knowledgeable support staff.
99.9% Uptime
The company guarantees a 99.9% uptime and states that “If a shared or reseller server falls short of the 99.9% uptime guarantee, you may receive one (1) month of credit for that package on your account.”
One-click WordPress Installation
No technical knowledge needed here. Just one click and you will have your brand new site ready for you to begin blogging.
User-friendly cPanel
The cPanel is the control panel that allows you to manage your hosting account. HostGator’s user-friendly interface allows you to manage your website, create custom email addresses, install WordPress, and so much more!
Affordable Pricing
HostGator has some of the most affordable web-hosting package prices in the industry, starting from as low as US$2.75 per month.
Free SSL
HostGator now offers free SSL or Secure Certificate to its customers. This provides security for your website by encrypting communications between the server and your website visitors.
How to Sign Up for Hosting with HostGator
First, head over to HostGator’s sign up page and click on ‘Get Started!’.
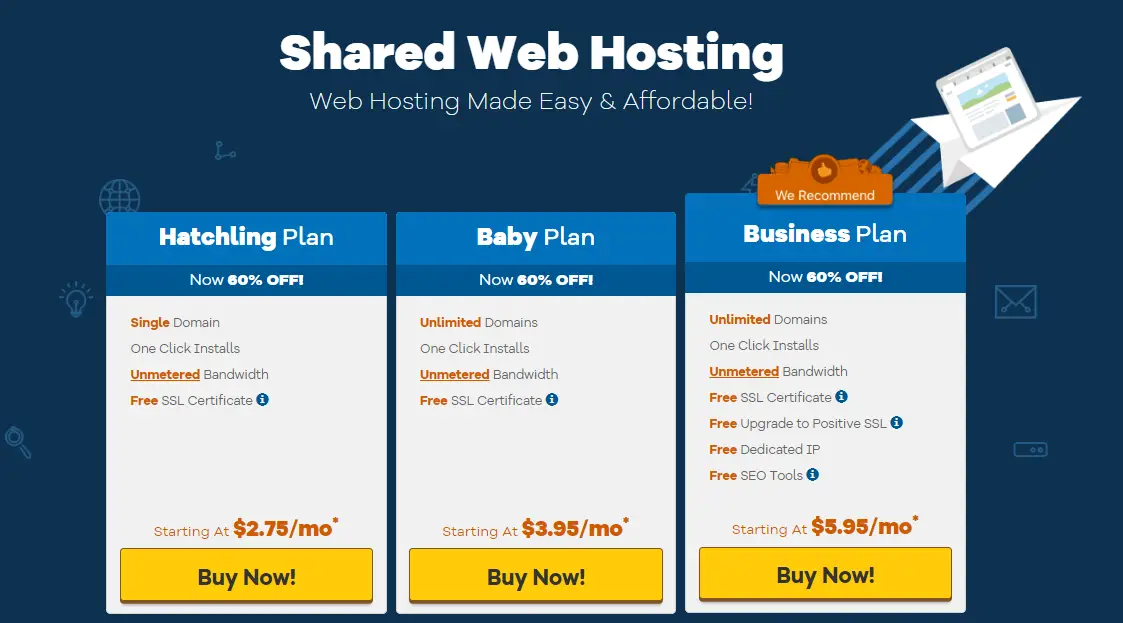
Select the hosting plan that would be suitable for what you want.
The three plans offered are:
- Hatchling Plan
- Baby Plan
- Business Plan
The Hatchling Plan supports hosting for one domain and is a good basic plan option for new bloggers.
Next, enter your domain name.
You can either register your new domain name or enter a domain that you already own.

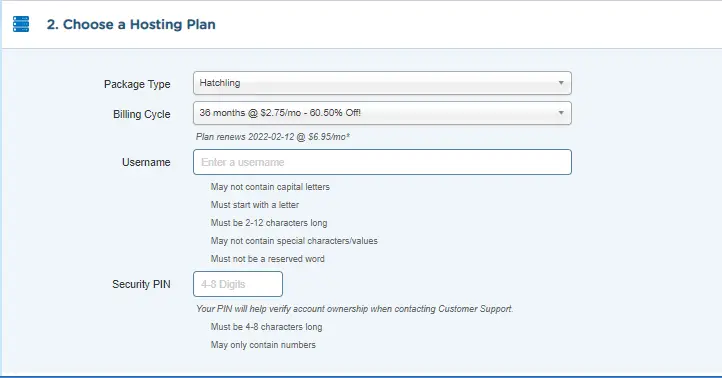
In section 2. ensure that all the information is filled out correctly. Select your package type and billing cycle. The longer the period of time that you pay for, the bigger the discount.
Create a username and a security pin. This pin should be kept on hand for any time that you have to contact HostGator’s Customer Service.
The next step is to enter all of your billing information.
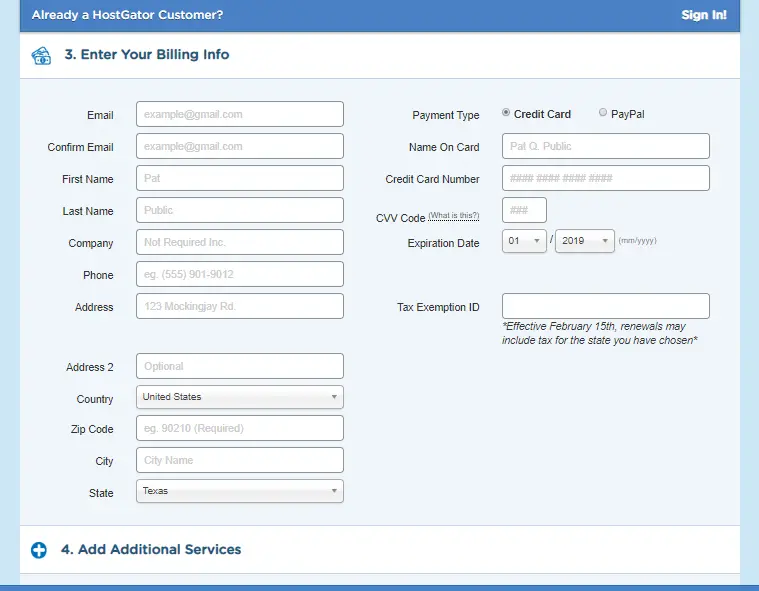
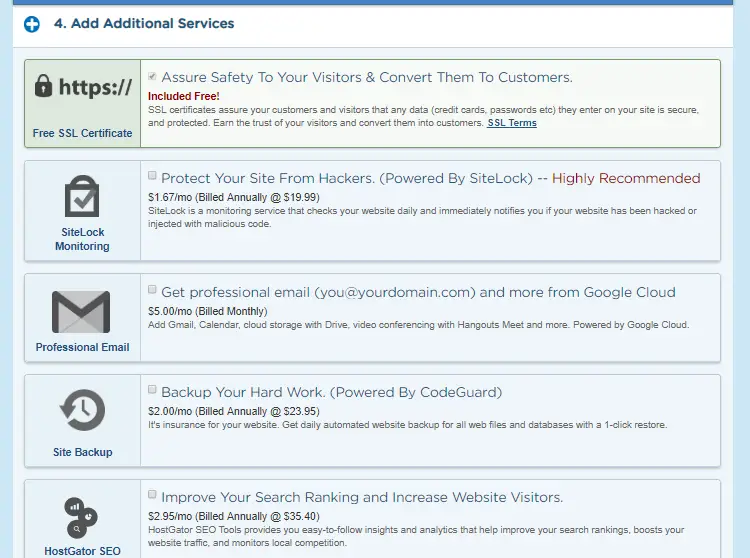
Pay particular attention to section 4, ‘Add Additional Services’, and be sure to check or uncheck boxes for products or services that you want or do not want.
Section 5. Enter a coupon code.
HostGator is offering a special on web hosting to readers of One Motivated Mommy. Use the coupon code ‘onemotivatedmommy‘ to receive a discount of up to 60%. (I recommend choosing the 36-month option to receive the best value for your money and you won’t have to worry about renewing for a while.)
Simply enter the above coupon code and click ‘Validate’.

Section 6. Review your order details. Again, ensure that everything is correct.
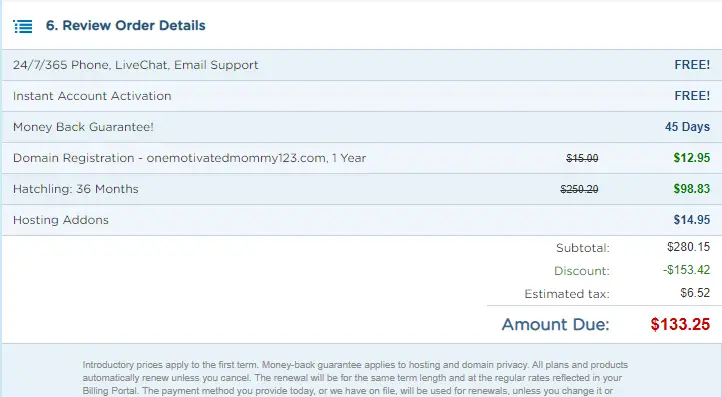
Once you are satisfied with everything, check the box to agree to the terms and policies and click on ‘Checkout Now!’

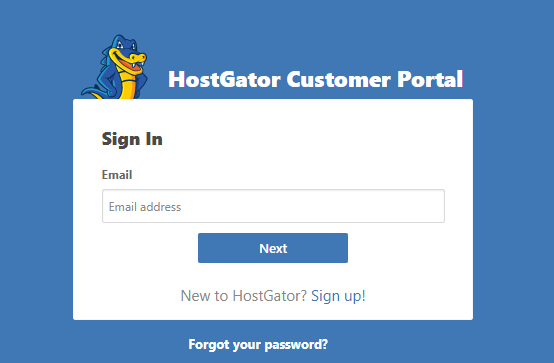
After you have done this, be on the lookout for an email from HostGator that will include access to your Customer Portal with your billing information as well as your Control Panel or cPanel where you will log into your hosting account.
The next step is to install WordPress.
Log in to your cPanel and under ‘Popular Links’ click on ‘Build a New WordPress Site’.
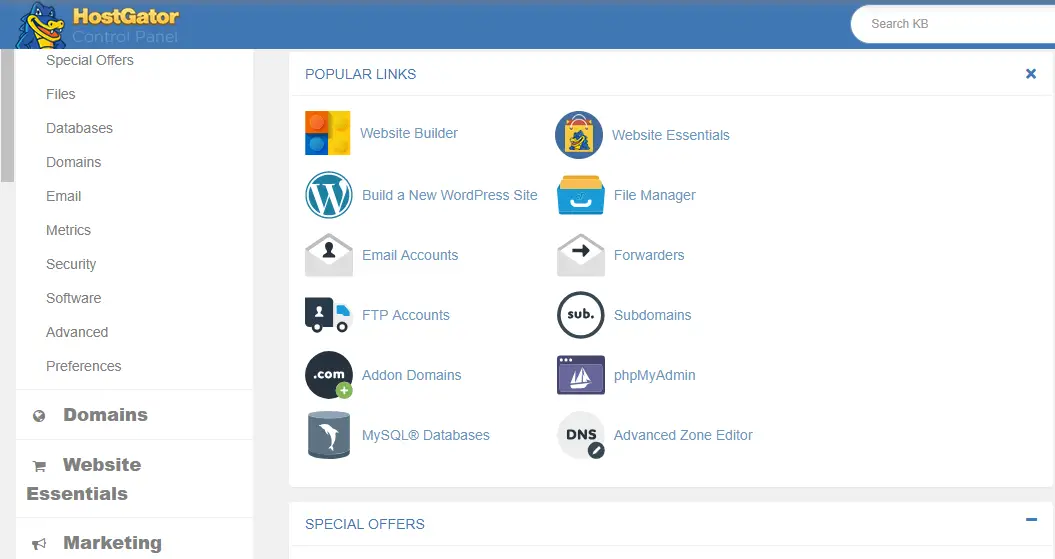
The following screen will come up – select your domain for WordPress installation and click on ‘Next’.
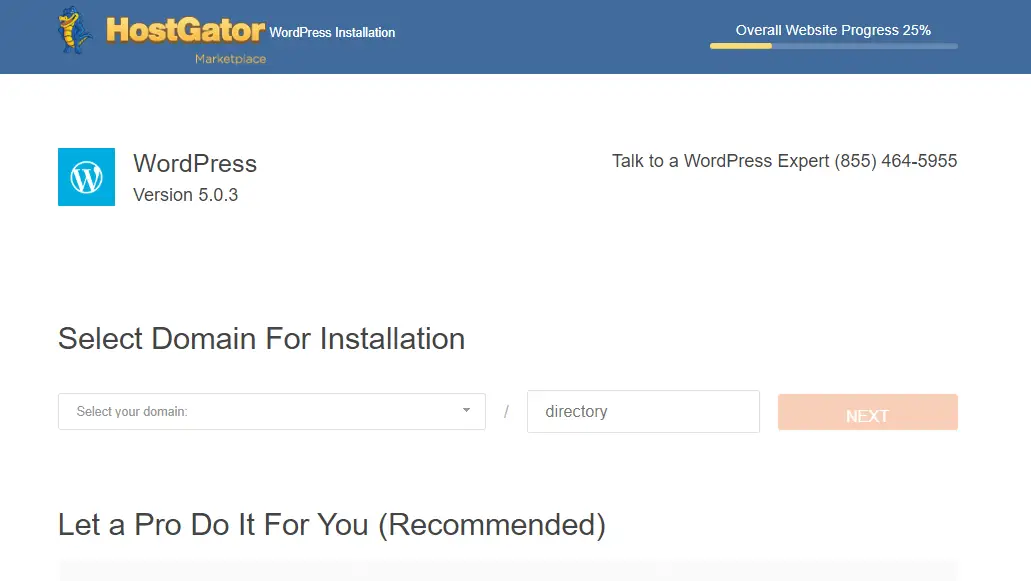
Fill out the following form, click to agree to the Terms of Service Agreement and click on ‘Install Now’
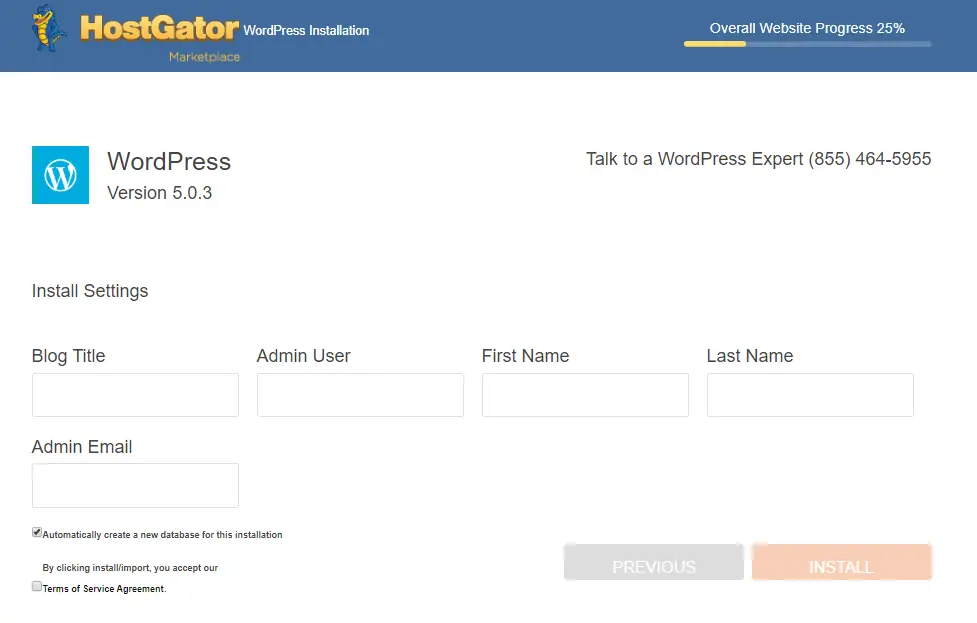
The installation will begin.
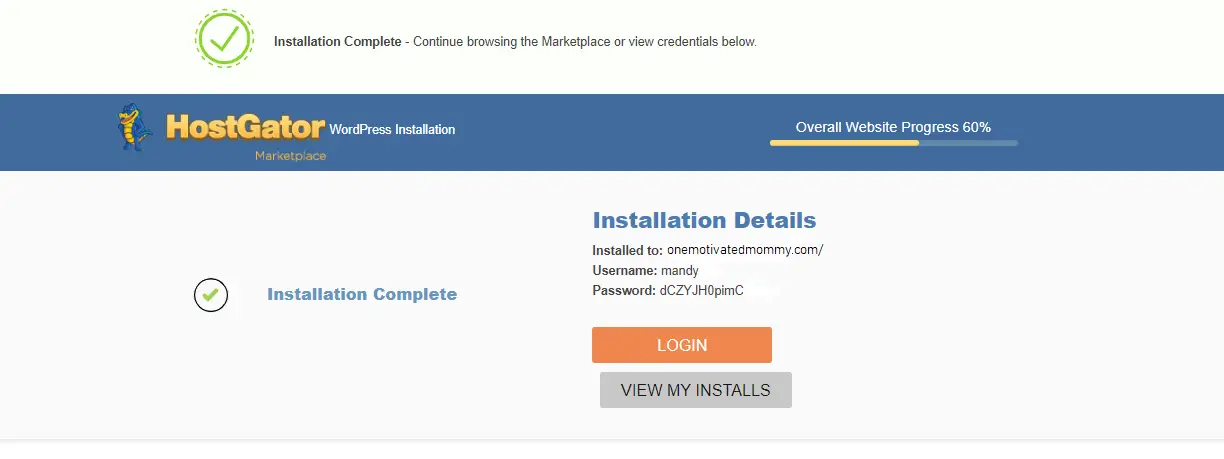
Once the installation is complete you will receive an email from HostGator stating that your new WordPress install is complete and you will be given the instructions on how to access your new blog. It will include login information and a generated password that you can change later on.
Here is a good resource on how to a strong password from passwordmanager.com.
Next, log into your brand new blog.
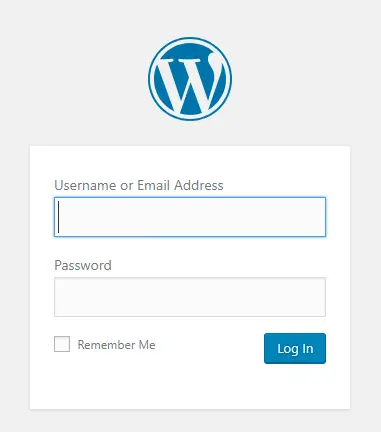
Once logged in you will see your dashboard which looks something like this:

Do not be intimidated by the look of the dashboard. Have a look around to get a feel for what the different menu items are. A few of these that you will become very familiar with are:
- Posts – This is where you will view, edit and publish your blog posts.
- Media – Here is where you upload and view your media content like images and videos.
- Pages – This is for creating pages such as your About Me, Policies page, Resources page, etc.
- Appearance – Here you can change the look of your site – details such as theme, widgets, colours and fonts.
- Plugins – Install, activate/deactivate and update your plugins. You can learn about adding plugins for your new blog here.
- Insights – This is essential to gauge the performance of your website and posts. These work with your Google Analytics. You will be able to view your most popular posts, bounce rate, countries that most visit your blog as well as session count and page views.
Install a Theme
When you start a blog on WordPress, you are given a default theme, but there are many free beautiful themes to choose from to get you started.
To change your theme go to Appearance->Themes->Add New Theme. From there you can browse, preview and choose from hundreds of free themes.
Choosing a free theme is good if you are on a budget, however as your website grows, later on, you may want more design options that you can get from purchasing a premium theme.
So, now you’ve set up the basics for your blog! Congrats!
Go right on ahead and start creating your first post.
You will learn lots more as you go along to keep improving all aspects of your website and your blog posts.
Blogging Courses that I recommend.
If you are looking for more help and guidance on blogging, below are the courses that I recommend.
Blog By Number by Suzi Whitford (read my review here)
When you are ready to monetize your site through affiliate marketing, the perfect guide is Making Sense of Affiliate Marketing by Michelle Schroeder-Gardner.
Feel free to share your blog with us and here’s wishing you lots of success on your blogging journey.
Happy Blogging!
